Python Machine Learning
Intro
Now we are starting to move towards AI development. Let’s move into Machine Learning a subset of AI, machine learning will be used for modeling information we want our programs to work off. This can then be used for language processing, vision processing and even for forecasting stock market trends and crypto trends.
The Process
Steps
- Import the Data
- Clean the Data, this can involve removing duplicates or anything that can create negative results
- Split the Data into Training/ Test Sets
- Create a Model, this can be a decision tree or something as sophisticated as a neural network
- Train the Model
- Make Predictions
- Evaluate and Improve
Libraries
Numpy- Useful python tool for working with numbers docsPandas- Useful for working with rows and columns docsMatPlotLib- Used for working with 2d charts docsSciKit-Learn- A common library for working with machine learning docs
Tools
Prerequisetes
Installation
- Download and install Anaconda
- Run the following to install in your terminal to install Jupyter Notebook
$ pip install -U notebook
$ pip install -U pandas
$ pip install -U scikit-learn
Run
- Now we will run Jupyter Notebook
- This will load us into the Jupyter Dashboard
$ jupyter notebookJupyter Notebook Intro
Create a new Notebook
- Select a directory in the Dashboard
- In the top right select new and python3
- Once the new Notebook is loaded change the title from Untitled to the name of your choice
Importing Dataset
- We will download a dataset from kaggle.com
- You will need to register for a account if one is not already owned
- Once logged in search for
Video Game Sales - Download and extract the data set to the same directory as the
Notebook
Coding the Application
- Each Notebook has segments, these are separate segments of code within the same context
- Each bit of following code will be put in different segments
Segment 1
- If you have multiple versions of Python on your machine Jupyter can pick up the wrong version of pandas, this can be resolved by adding
!pip install pandasto the first line of your first segment
import pandas as pd
df = pd.read_csv('vgsales.csv')     # Pandas allows us to read the CSV file
# df                                # This allows us to dump the raw data out if we want to see it
df.shape                            # This allows us to see the rows and columns of the dataset
Example
Segment 2
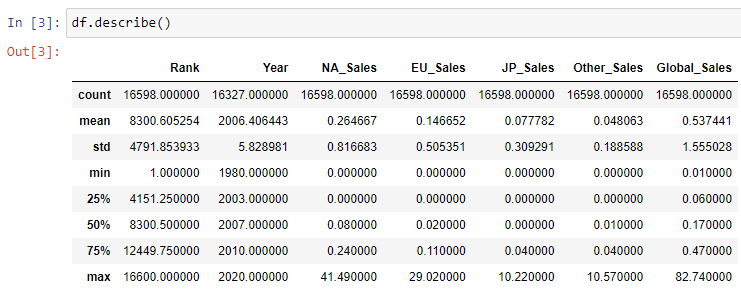
df.describe() # Another way to dump data about the datasetExample
Segment 3
df.values # This will output the actual data itself in its original array formatExample
The Application
- We will create a music recommendation program
- We will get out initial data from here
Segment 1
- We will break the data into two sets
- The first set is expected input from the user
- The second set is results based on the expected input
import pandas as pd

music_data = pd.read_csv('music.csv')
X = music_data.drop(columns=['genre'])  # Input Data (Always with a capital letter for input)
y = music_data['genre']                 # Output Data (Always with lower case for output)
Segment 2
- Here we will use scikit-learn to predict from the given dataset
from sklearn.tree import DecisionTreeClassifier

model = DecisionTreeClassifier()
model.fit(X.values, y.values)                        # Here we are training our data
predictions = model.predict([[21, 1], [22, 0]])      # Then we use this data to predict future results
predictions
Segment 3
- Next we want to test how accurate our test set is
- This will help us determine if we should change out initial training set
- We will get a score back between 0 and 1, the closer to 1 the better
- Also running this Segment multiple times will give different results each time
from sklearn.model_selection import train_test_split
from sklearn.metrics import accuracy_score

X_train, X_test, y_train, y_test = train_test_split(X, y, test_size=0.2)  # Allocating 20% of data for testing and 80% for training, this method returns a tuple

model.fit(X_train.values, y_train.values)
predictions2 = model.predict(X_test.values)

score = accuracy_score(y_test.values, predictions2)
score
Segment 4
- In real examples we will have millions of rows and it is important to persist our data
- We will use the
joblibmethod to save and load models
import joblib                                      # This still comes from scikit-learn

joblib.dump(model, 'music-recommender.joblib')     # Here we create a file on our desktop of the model for future use
Segment 5
- Next we will load our model and use it for predictions
model2 = joblib.load('music-recommender.joblib)

predictions2 = model.predict([[21, 1]])
Segment 6
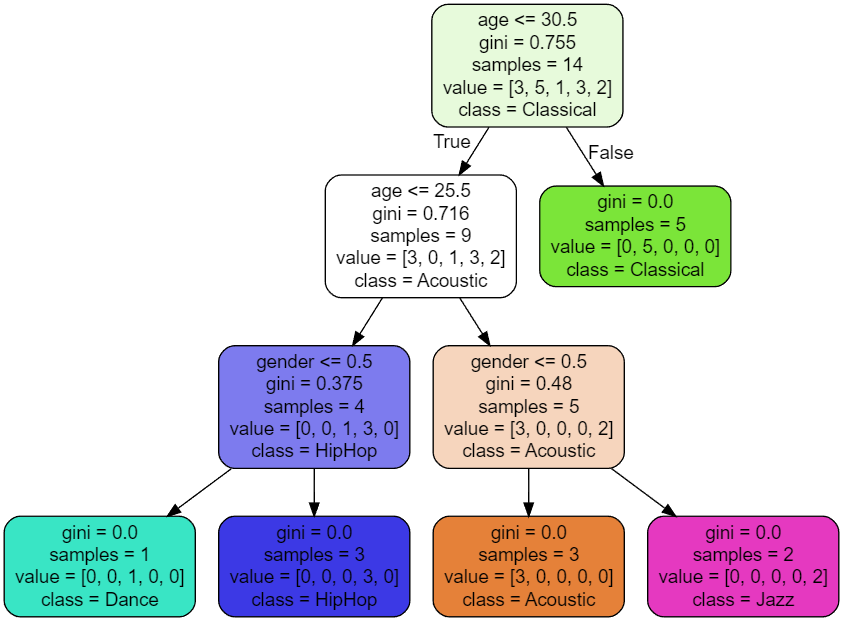
- Next we will visualise our Decision Tree
- We use a VSCode plugin for the graph Dot Graph
from sklearn import tree

tree.export_graphviz(
    model2,
    out_file='music-recommender.dot',
    feature_names=['age', 'gender'],
    class_names=sorted(y.unique()),              # This is required as many names are repeated
    label='all',
    rounded=True,
    filled=True
)
Final Product
- Here we have the decision tree from our dot file output
- It shows the decisions our model takes to resolve predictions
Decision Tree